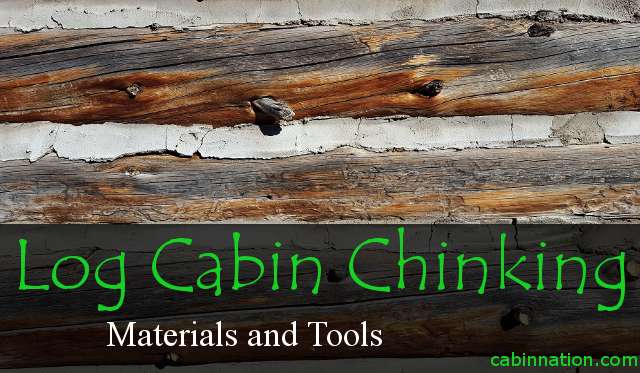
Log Cabin Chinking is a technique for log home owners to seal narrow openings between cabin logs and fill cracks or crevices within logs.
Chinking helps to keep nature’s elements outside, maintain a comfortable environment inside, and reduce air infiltration and moisture intrusion.
Contents
- What Is Log Cabin Chinking?
- Log Home Maintenance Cost – Chinking $10,000 plus
- How To Chink A Log Cabin or Log Home
- Is Chinking Really Needed For Log Cabins
- Log Cabin Chinking Materials
- Chinking Tools or Chinking Caulking Tools
- How Long Does Chinking Last
- Log Home Chinking Look and Feel
- How To Load a Bulk Loading Gun
- Using A Chinking 5 Gallon Follow Plate
- Where To Buy Chinking For Log Homes
- Log Cabin Chinking Final Thoughts
What Is Log Cabin Chinking?
Chinking provides insulation and seals gaps between logs with a flexible material preventing drafts, water, debris, and insects from entering your cabin.
Log home chinking will help prevent heat loss or conditioned air in the interior of your home through open gaps in upper log exterior walls. It will also help reduce log movement or log walls slightly shifting in your cabin or house.
Over time, openings in log joints can form, and logs tend to naturally crack or check as they expand and contract from moisture and drying out. This is especially true for the exterior lower log areas in your home or log courses closest to the ground which tend to be the most exposed to seasonal moisture variations.
Lower level logs will potentially be exposed to standing rain water or snow accumulation that will slowly try to infiltrate the wood.
Log home chinking will help keep rodents and small insects out of log houses. It will also help keep weather elements and debris outside of your log home.
Log Home Maintenance Cost – Chinking $10,000 plus
Chinking can cost upwards of $10,000 or more depending on cabin size, materials, and labor. You can DIY (Do It Yourself) and reduce costs by supplying the labor.
5 gallon pails of chink will cost $250 – $300. A 11 ounce tube of chink costs around $10 – $12. A 30 ounce tube of chink costs $27 – $31.
How much chinking will i need? You will need to calculate the amount of product such as Perma Chink for your project by multiplying the total linear feet of your logs by the gap size between your logs or joints. A typical gap size between logs is anywhere from 3/4 inch to 3 inches.
Make sure you factor in the cost of picking up or shipping chink as well. Check chink providers like Perma Chink and Log Jam to determine if they offer free shipping or delivery to your job site.
You may need to purchase a few additional log home tools to complete the job yourself such as a grout bag, trowel, or follow plate.
A way to save on the cost to chink a log home is to use non synthetic chinking such as mortar or a traditional log cabin chinking recipe using material sources that cost less. The ingredients for your log cabin chinking recipe may even be found around your home where sand, dirt, straw, and clay may be plentiful.
Be careful. Incorrectly mixing or applying log cabin mortar chinking and other materials could add time and money to your project in the long run.
How To Chink A Log Cabin or Log Home
- Safety First, review the application, curing, and safety information of your project material. Use the appropriate protective eyewear and gloves. Make sure that you are working from a flat surface.
- Clean out each log joint, ensuring it is clean and dry.
- Place backer rod material and wire mesh (if using wire mesh) between your log home joints
- Apply log home chinking product using a bulk loading gun, trowel, or another application tool
- Spread the material for an even thickness. Using a trowel, firmly push the material so it adheres to the top and bottom of the joint
- Smooth out the material for a flat finish using a wet trowel or brush
- Wipe away any log chinking drips from the log surface
- Clean up your work area and tools
- Stand back and admire your handy work. Great Stuff. Nicely done!
Is Chinking Really Needed For Log Cabins
Yes, all cabins made with natural log timber will require a level of chinking at some point. Whether you apply from the early stages of a cabin build or as a cabin ages, settles, and shifts.
Logs with full scribe log homes will settle and weather over time. As the scribe log home shifts there is potential for your cabin chinking to start to fail and let in elements from the outdoors.
Log Cabin Chinking Materials
There are a variety of log chinking products, materials, chinking recipes, and application techniques available.
You can purchase pre-mixed, synthetic chinking materials like Log Jam chinking, make your own synthetic chinking, or mortar chinking as homemade chinking from available resources like Portland cement around your property.
What Is Log Cabin Chinking Made Of
Chinking can be made by mixing a combination of sand, a mixture of clay, salt, wood ash, straw, lime, dirt, water, and many other materials. Some individuals even mix in Portland cement or masonry mortar.
Chinking Tools or Chinking Caulking Tools
We don’t recommend using spray foam as it likely will not stand up to nature’s elements long term.
Backer Rod
A backer rod fills imperfect joints and cracks in between chinking logs. There are a variety of backers available, although they tend to be synthetic foam, flexible foam, and vary in diameter.
These rods serves as a bond breaker that log gap sealant material will not stick to. Allowing for the sealant products to move slightly with the logs.
Open Cell Backer Rods
Open cell rods are generally for indoor use where there is a low presence of moisture.
Closed Cell Backer Rods
Closed cell rods are denser and are popular for exterior and outdoor applications.
Grip Strip Backer Rod
A grip strip rod is a trapezoidal-shaped foam backer rod. This rod is used to form a tight seal and sits flush between courses of logs. Grip strip backer material might be a little extra money but they have high product performance.
Using backer rod modern materials and finishing off with a cover layer of Perma Chink creates a waterproof and airtight seal for any style log homes or even old structures.
Old cabins or old houses may have used items like grass, straw, corn cobs, newspaper, and fiberglass insulation as backer material.
Chinking Gun
Manual, Electric, and Air bulk loading guns all do a great job applying natural or synthetic chinking products. Which one you prefer depends on the size of the log chinking job and your pocketbook.
Accessories for log cabin chinking guns include nozzle attachments of various sizes and angles that are threaded. Also options for easier loading of caulking materials into the caulk tool or gun. Options such as screw drive loaders, cartridge loaders, and chinking pump loaders.
Spatula or Scraping Tool
Look for a spatula tool with flexibility in the blade. You will want to apply pressure and bend the blade as you are manipulating and smoothing out the sealant material.
You should not need to apply too much pressure. A spatula with a comfortable grip and a stainless steel blade to avoid rusting are best.
Trowel
A trowel can help you transfer Perma Chink between logs and joints. With a trowel, you will want to ensure that the sealant is worked into the area properly to allow for maximum coverage, adhesion, and a complete seal.
A trowel can help you in a variety of ways including pushing the chink into the log openings, smoothing the sealant, and removing old mortar chinking.
Wire Mesh
Wire Mesh can be used independently of a backer rod or in addition to the backer rod. The wire mesh serves to help hold the caulking material or mortar chinking mix in place between one log and the next log.
If using in combination with a backer rod, the wire mesh helps keep everything in place and allows for a tighter, strong seal in log buildings or old log homes. Wire mesh can help support and hold in place old fashioned mortar, Perma Chink, Log Jam or other sealant around the largest log gaps.
Foam Brush
A foam brush used when chinking can help with smoothing out the product or even cleaning. If you accidentally apply a little chinking in an area that you didn’t attend you can wet a foam brush to help wipe and clean away the material.
If you apply a sealant, paint, or stain to your chink a foam brush could help with this as well.
Grout Bag
A grout bag will come in handy if you have small jobs that do not require much chinking. Jobs such as repairing a a small damaged area.
Perhaps you have a medium-sized project. Or do you need to reach into tight spaces in your log home building that a chink gun or sausage gun will not allow you to reach? A grout bag can help you with applying gap sealant quickly.
Load the grout bag full of your chinking product. You will be able to squeeze the chink directly into the small cracks and crevices. Or you can just go the route of the old fashion way with by using a trowel, stick, or your hands.
Isopropyl Alcohol
Keep gap sealant material from sticking to your tools using a fine mist of Isopropyl Alcohol or water. This allows you to spread, push, place, and position the product into place without too much hassle with the material wanting to adhere to your tools.
You will not need to use too much water or alcohol as a little goes a long way.
How Long Does Chinking Last
Quality log cabin chinking should last 20 to 40 years depending on regular maintenance, weather, and climate variation factors.
Chinking could potentially last the life of the structure but depends heavily on several factors. Shifting and settling of the cabin structure could impact the life of your sealant product and introduce gaps and cracks.
The make up of the material and light or heavy exposure to elements will also play a part in determining the life span of the log gap sealant.
Synthetic chinking will stretch and flex with your cabin during freeze and thaw cycles. At a minimum, traditional chinking products should last you a couple of years.
The new synthetic chinking used in today’s modern log homes should last you even longer. You can even add a flexible sealant such as Perma Chink log home sealant to extend the life of your material.
Log Home Chinking Look and Feel
Log Home Chinking definitely can add to the aesthetic appeal of your log home. With products like chinking paint, the color combinations seem to be infinite.
You can apply different textures to your log home chinking. Even paint your sealant product a solid color such as light gray. You can even match the dark brown color of your logs, or vary the degree of transparency.
In addition, you can add ultraviolet protection from the constant sun’s rays by applying paints and stains.
How To Load a Bulk Loading Gun
- First step, grab the ladder hook pull handle. Then, pull back on the steel rod and chinking plunger to release any built-up pressure in the bulk loading gun. You may have to twist the ladder hook pull handle 180 degrees to disengage the ratchet mechanism.
- Unscrew the front cap of the bulk loading gun. The front cap is the end with the chinking nozzle.
- Fill the empty bulk loading gun tube with new chinking material.
- Wipe and clean away any log home chinking material that didn’t make its way fully into the bulk loading gun tube. You can use a towel, trowel, and clean water for this step.
- Replace and screw back on the front bulk loading gun cap.
- Grab the ladder hook handle and slowly push the steel rod and chinking plunger back into bulk loading gun tube. You will want to point the bulk loading gun towards the sky. Aim up while pushing the plunger forward to remove any air pockets trapped within the material.
Different Methods Filling Bulk Loading Gun
There are a couple of different methods or techniques that you can use to fill a bulk loading gun with product or material. Typically chinking is loaded from 5 gallon pails.
- Trowel – Load the chinking bulk loading gun or sausage gun with a trowel. This involves scooping out a portion of your purchased modern chinking material or your DIY chinking mixture with a trowel. With each portion, use the trowel to carefully place the chink or mortar chinking inside the sausage gun tube or chamber.
- Tight Seal Cone – Load by creating a tight seal between the bulk loading gun tube and the new log chinking material. You can use a towel to stack up the chinking product into somewhat of a cone shape. The next step is to place the chinking tube over and around this stacked material creating the tight seal. Then pull back on the ladder hook pull handle. This method creates somewhat of a vacuum and will pull chinking material directly into the bulk loading gun.
- Follow Plate – Use a follow plate that sits inside 5 gallon buckets and on top of the sealant product. This helps create a tight seal for loading product into the bulk loading gun.
Using A Chinking 5 Gallon Follow Plate
A follow plate or follower plate is one of those great products that helps with loading new chinking material into a chinking gun. It also helps reduce the mess of bulk loading chinking mixture or flexible caulk.
Follow plates can be either threaded or non-threaded allowing a tight seal with the gun. This tight seal keeps the mess to a minimum.
The tight seal also helps prevent air leaks or air infiltration as you load the chinking product. This also reduces your product reload times from taking a long time. Therefore, using a chinking or caulk follow plate is a good idea and we recommend it.
Where To Buy Chinking For Log Homes
Retailers such as Permachink.com, Weatherall.com, WesternLogHomeSupply.com and LogHomeStore.com are good options. You could even check out your local Lowes or Home Depot for sealant products or synthetic chinking.
An option is to buy material for log cabins like Perma Chink versus making your own. Especially if you are in the market for synthetic chinking material.
Log Cabin Chinking Final Thoughts
To sum up, log home chinking will help preserve your structure for many years to come. Potentially 20 to 40 years depending on the elements and your commitment to ongoing maintenance.
How long chinking lasts at your cabin may fluctuate depending on whether you have a modern cabin in cold northern Minnesota or a sprawling Swedish cope style log home in southern Texas where it is typically quite warm.
The art of chinking is a project that even a weekend DIY’er can quickly master the ease of application. Chinking log homes can be a family project where everyone can help regardless of age or experience.
Therefore, stop into your local hardware store, lumber yard, or one of the big box stores. They can help you with any common question for log chinking supplies and synthetic chinking products.
Ask a questions such as which material is best for chinking log cabin in your neck of the woods. They can also walk you through the tools and application methods best suited for your cabin and application. Do you really need triple stretch chinking material and all the chinking accessories? They can help you answer that. Good Luck!
For those that are still in the planning phases of their cabin builds, check out our log cabin kits post. Log home kits could be a quality option for your log home’s construction and may help you build your log style cabin or house with log siding a little quicker. Chinked log home kits look amazing and cut down on the overall time required for building a cabin.
