Knowing how to find trail cameras on your property is essential as a property owner. Understanding the typical locations favored for setting up these devices makes it easier to locate them.
Contents
- Common Trail Cameras Locations On Your Land
- 1. Property Perimeter
- 2. Tree Trunks and Branches
- 3. Tree Stands or Ground Blinds
- 4. Follow Game Trails
- 5. Food Plots
- 6. Bait Piles
- 7. Wildlife Signs
- 8. Game Feeders
- 9. Wild Food Sources
- 10. Fence Posts or Other Placed Posts
- 11. Off the Ground
- 12. Woods and Dense Vegetation
- 13. On the North Side of Trees
- 14. Elevated Locations
- 15. Natures Water Sources
- Practical Tools to Find Trail Cameras
- Recognizing Hidden Trail Cameras
- Conclusion: How to Find Game Cameras on Your Property
- Related Articles:
Common Trail Cameras Locations On Your Land
1. Property Perimeter
I carefully examine the perimeter of my property. This is because some trail cameras may be placed at the borderlines to capture images of animals entering or exiting the area. By thoroughly checking these areas, I can ensure that unwelcome intrusions or hidden monitoring devices are discovered and dealt with accordingly.
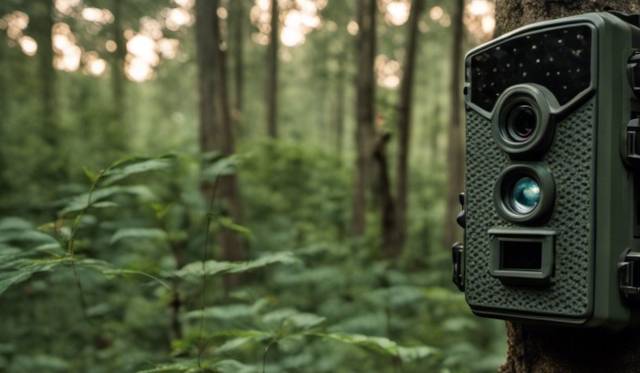
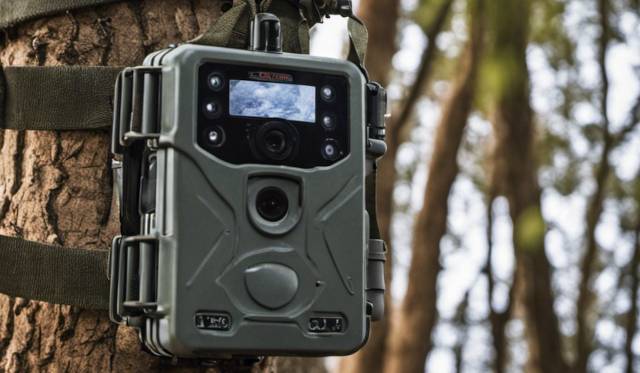
2. Tree Trunks and Branches
It’s quite common to find trail cameras mounted to tree trunks or attached to tree branches. These locations allow you to elevate your trail camera to the desired height in order to have a clear and unobstructed view of the surrounding area you are monitoring.
3. Tree Stands or Ground Blinds
Trail cameras are often placed in areas where tree stands, or ground blinds are present, as these locations are typically used to monitor game trails and deer activity. Tree stands, and ground blinds are frequently positioned at the center of an area, with spokes or shooting lanes radiating outward to provide hunters with clear lines of sight and safe shooting opportunities.
4. Follow Game Trails
Game trails are paths that animals use regularly, making them ideal places for hunters and wildlife enthusiasts to set up trail cameras. Follow these trails, and you might come across game cameras positioned to capture footage of the wildlife using the trail.
5. Food Plots
You can find trail cameras near food-based locations, such as around food plots. Food plots are intentionally planted by property owners or hunters to attract wildlife, making them ideal spots for trail camera surveillance. By monitoring these areas, I can gain insight into the preferred paths, feeding patterns, and species that visit my property.
6. Bait Piles
Hunting bait piles are typically areas where hunters place food or attractants to lure game animals into a specific location for hunting purposes. These bait piles can include things like corn, apples, or other food items that are attractive to the targeted game species.
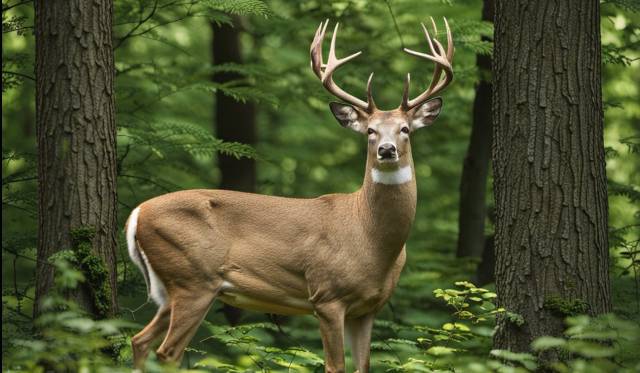
7. Wildlife Signs
Looking for signs of bear, deer, or other wildlife activity, such as animal tracks, deer scrapes or rubs, is a helpful first step in finding a trail camera that may be set up to monitor those animals in that area. Hunters may also use multiple cameras at different angles to capture a more comprehensive view of the area. The hidden cameras can be set to trigger automatically when motion or heat is detected, and the images or videos captured can be used to track animal movements, identify specific individuals, and plan hunting strategies.
8. Game Feeders
Elevated deer feeders or game feeders. These are areas specifically used to attract deer, bears, and other wildlife. Game feeders have a store of food that animals frequent to snack on the dispersed food. Corn and grain are common in game feeders where the food is spread out on the ground, typically on a timed interval.
9. Wild Food Sources
Find natural food sources for animals like grasslands, farm fields, or trees producing fruits or nuts, as these are common areas to find trail cameras. Near food, you are sure to find deer and other wildlife as they gather and feed
10. Fence Posts or Other Placed Posts
Fence posts provide a stable and elevated platform for trail cams, allowing for a wider field of view and better image capture. Fence posts are frequently used as property boundaries, making them a convenient and discreet location for monitoring and surveillance purposes.
11. Off the Ground
When hunting for deer or similar-sized animals, trail cameras are usually positioned at least 3 feet off the ground. This helps avoid false triggers and allows for better monitoring of the desired animals.
12. Woods and Dense Vegetation
Woods and areas with dense vegetation can also be prime locations for trail cameras, as wildlife hangs around these areas for cover and security.
13. On the North Side of Trees
Avoid false triggers by inspecting the north side of trees that face a suspected camera location. Skilled trail camera users typically place cameras facing north to reduce false triggers caused by sunlight through sunrise and sunset cycles.
14. Elevated Locations
Don’t forget to look in elevated positions, as some people place trail cameras higher up to keep them out of sight or to avoid startling deer and other wildlife. For example, higher up in a tree than you would expect. Another example is attached to a barn, cabin, or shed with the camera lens positioned downward towards the ground.
15. Natures Water Sources
Water sources are another crucial area to check for trail cameras. Deer and other wildlife are naturally drawn to water resources, which could include ponds, streams, creeks, rivers, lakes, or any body of water. These areas are often frequented by wildlife, as they provide a vital source of hydration and can attract a variety of different animal species. Water sources often become hotspots for trail camera placements, as capturing images of animals near these resources can provide valuable information about their habits and routines.
Practical Tools to Find Trail Cameras
Determining how to find trail cameras on your property can feel somewhat like looking for a needle inside a haystack. However, with some smart strategies and equipment, you can locate them more easily. In this section, I’ll walk you through practical steps to help you find trail cameras on your property.
Flashlight or Head Lamp
I recommend using a flashlight or headlamp as they can be an effective tool to identify and find trail cameras on your property. Shine the light around the area where you suspect the camera is located, paying close attention to any reflective surfaces. The lens of the camera may reflect the light, making it easier to spot.
Some trail cameras have small LED lights that indicate when the camera is active, which can also be easier to see with a flashlight or headlamp. It’s important to be cautious when using a flashlight or headlamp, as the light may alert any animals or people in the area to your presence.
GPS Devices
GPS devices can be a useful tool for identifying and locating trail cameras on your property. Some trail cameras come with built-in GPS, which can be used to track their location. If your camera doesn’t have GPS, you can use a handheld GPS device to mark the location of the camera when you first set it up. This can be especially helpful if you have multiple cameras on your property, as it can be easy to forget where each camera is located.
Some trail cameras have wireless capabilities that allow you to view photos and videos remotely using a smartphone or other device. This can be a convenient way to check on your cameras without having to physically search for them. However, it’s important to note that GPS devices may not always be accurate in detecting trail cameras, especially in areas with poor reception or dense foliage. Therefore, it’s always a good idea to use multiple detection methods when searching for trail cameras.
Infrared Sensor
Some modern Smartphones have infrared sensors that can be used to detect the infrared emissions of trail cameras. If you have a phone with an infrared sensor, you can use it to detect the infrared light of a trail camera by launching an infrared camera app and pointing your phone’s camera at the area where you suspect the camera is located.
The app will display the infrared emissions as visible light, making it easier to spot the camera’s location. It’s important to note that not all trail cameras have infrared lights, and some cameras may have low-glow IR flashes that are more difficult to detect. Therefore, it’s always a good idea to use multiple detection methods when searching for trail cameras.
Infrared Flash
Infrared flash is a common feature found in most modern trail cameras, with many of them utilizing a low-glow IR flash. When activated, the front of the camera emits a faint red glow that is not visible to the naked eye of a human but can be detected by some animals.
The glow may last for only a brief moment if the camera is configured to take pictures instead of recording videos, making it more challenging to detect. As a result, spotting trail cameras with low-glow IR flashes can be difficult but not impossible, despite their widespread use in the market.
Smartphone Bluetooth Signals
Using Bluetooth signals can be an effective way to identify trail cameras on your property. Many trail cameras come with Bluetooth capabilities that allow them to connect to smartphones and other devices. If you suspect a game camera in the area, you can leverage your smartphone technology to scan for available Bluetooth devices. Look for any devices with names that suggest they may be trail cameras, such as Browning, Bushnell, or Moultrie. Knowing how trail cameras work can also be very helpful.
Not all trail cameras have Bluetooth capabilities, and some cameras may have their Bluetooth turned off to conserve battery life. Bluetooth signals have a limited range, so you may need to be relatively close to the camera to detect its signal.
Smartphone Wi-Fi Networks
Try scanning for available Wi-Fi signals. Compared to Bluetooth, WiFi signals span a broader range. Many wireless trail cameras have their Wi-Fi turned off most of the time.
Metal Detector
A metal detector can help to identify trail cameras on your property. Some trail cameras have metal components, such as mounting brackets or screws, that can be detected using a metal detector. Please note that not all trail cameras have metal parts, so this method may not always be effective.
Using metal detection devices can be time-consuming and may require a lot of random searching. It’s best to use this method as a last resort after other detection methods have been exhausted. If you do decide to use a metal detector, be sure to follow all safety guidelines and obtain any necessary permissions before searching on private property.
Speak With Your Neighbors
Don’t underestimate the power of enlisting the help of your neighbors to locate trail cameras on your land. They may be more familiar with the area and can provide useful insights on potential locations or equipment that might have been installed. You can ask other neighbors if they have seen any cameras or noticed any unusual activity on your property. Make sure to approach the topic respectfully, as they might not be aware of the trail cameras themselves.
If you suspect that a neighbor may have placed a trail camera on your property, you can ask them directly if they have done so. It’s important to respect your neighbors’ privacy and not accuse them of wrongdoing without evidence. Approach the conversation with your neighbor in a respectful and non-confrontational manner.
Property Map
Creating a map of your property can also be a useful tool in your search for trail cameras. Mark the locations where you’ve already looked, as well as any spots where you’ve found cameras or suspicious equipment. This can help you keep track of your progress and identify areas that still need to be explored.
Tripod with Mounted Camera or Binoculars
Using a tripod with a mounted camera can be a useful way to identify trail cameras on your property. Mount your camera on a tripod with a telephoto lens and scan the area where you suspect the camera is located. Look for any signs of the camera, such as wires or reflective surfaces, and use the telephoto lens to zoom in on any suspicious areas.
You can also use the camera’s zoom function to get a closer look at any potential cameras. However, it’s important to note that this method can be time-consuming and may require a lot of patience. Additionally, it may not be effective in areas with dense foliage or poor visibility.
Ultraviolet Light
Some trail cameras have ultraviolet coatings that can be detected using ultraviolet light. This can be useful in finding cameras that have been hidden in bushes or other vegetation.
Recognizing Hidden Trail Cameras
As someone who spends a lot of time outdoors, I have come to recognize the subtle signs of camouflaged trail cameras on my property. These trail cameras can be quite tricky to spot, as they often blend in well with tree bark and other natural elements. In this section, I will share my tips for spotting camouflaged trail cameras.
Square or Rectangle Shape in Nature
One of the first things I look for is the shape of the trail camera. Most trail cameras are square or rectangular in shape, which can contrast with the organic shapes found in nature. Nature doesn’t naturally create 90-degree angles. While it is possible to find angles that are close to 90 degrees in nature, it is not common to find perfect right angles. This makes the angles on the game camera stick out a bit, and therefore they are easier to identify if you know what you’re looking for.
Color
Additionally, I pay attention to the colors on tree bark. While hidden trail cameras are often camouflaged to match the tree bark they’re mounted on, they don’t always match perfectly. Look for subtle differences in color or texture, which might indicate a hidden camera. Some may still have distinct colors or patterns that make them easier to spot.
Look for cameras that are a different color than their surroundings, such as a black camera on a white tree or a green camera on a brown tree. Some cameras may have a reflective surface that catches the light and appears to be a different color than their surroundings.
Reflection
Reflections can be another giveaway for hidden trail cameras. During the day, the sun may cause a reflection on the camera’s lens or casing. At night, the camera’s red glow or white flashes may be visible from a distance. Keep an eye out for these glints or flashes when scanning your property.
Angle of the Sun: The sun’s angle can greatly affect the reflection of a hidden trail camera lens. If the sun is directly overhead, the reflection of the lens may be obscured by the shadow of the camera itself. If the sun is low on the horizon, the reflection may be too dim to see or may be distorted by other objects in the area.
The angle of the sun can change throughout the day, making it difficult to use the reflection of the lens as a reliable method for finding a trail camera.
Type of Lens Coating: The type of lens coating on a trail camera can also affect the reflection of the lens. Some cameras have anti-reflective coatings that reduce the amount of light that is reflected off the lens, making it more difficult to see.
Other cameras may have coatings that enhance the reflection of the lens, making it easier to spot. These coatings can also be affected by environmental factors such as dust, dirt, and moisture, which can further obscure the reflection.
Distance of the Camera: The distance of the hidden trail camera from the observer can also affect the reflection of the lens. If the camera is too far away, the reflection may be too small to see or may be obscured by other objects in the area. The distance of the camera can affect the angle of the reflection, which can make it more difficult to pinpoint the exact location of the camera. In general, the closer the camera is to the observer, the easier it will be to spot the reflection of the lens.
Mounting Straps and Brackets
Trail cameras come with mounting straps or other materials that are used to secure trail cameras to a tree trunk, branch, post, or other object. Look for any material that appears to be wrapped around a tree or other object, especially if it is a different color than the surrounding area. They are usually made of some durable material like metal or strong fabric.
Game cameras may also have distinctive mounting brackets or other features that make them easier to spot.
Trail Camera With Solar Panel
Some trail cameras come equipped with solar charging panels to extend their battery life. These panels can make the camera more noticeable, especially if they stand out against the surrounding environment.
Trail cameras with solar charging panels are becoming increasingly popular as they can extend the camera’s battery life and reduce the need for frequent battery replacements. However, the solar panels can make the camera more noticeable, especially if they stand out against the surrounding environment.
It’s important to consider the placement of the camera and the color of the solar panel to ensure that it blends in with its surroundings. Additionally, some cameras may have detachable solar panels that can be moved to a different location, making them more versatile and easier to conceal.
Animal Behavior
Yes, animals can detect trail cameras. Look for any unusual animal behavior in the area. Animals may be spooked or avoid certain areas if they detect the presence of a trail camera.
Conclusion: How to Find Game Cameras on Your Property
Locating hidden trail cameras on your property can be difficult, but by following practical steps and using multiple detection methods, you can increase your chances of finding them. It’s important to be patient and persistent, as finding hidden cameras can take time and effort.
By paying attention to details such as shapes, colors, and reflections, you can improve your ability to find trail cameras. Remember to stay confident and knowledgeable in your search to find hidden trail cameras, and don’t hesitate to seek help from others if needed. With practice looking and a keen eye, you can identify game cameras on your land.
